Showing posts with label Homemade. Show all posts

Monday, December 15, 2014

Gingerbread House - Santa's Home

My Cutter Set - years old but perfect.
A few years back I bought a cutter set for a gingerbread house as I always wanted to make my own little creation. Everytime I saw one at one of the many Christmas markets I went to in my life, I thought, I want to make that (it's a curse as I think that about a lot of things). Anyway, there I was with my set and no idea how to start. Gingerbread has a long tradition in Germany, especially at Christmas time where stalls at Christmas markets are bursting with hearts decorated beautifully with coloured icing and adored by beautiful sayings (most of the times, the hearts would have been made months beforehand and didn't taste that nice anymore but it was delicious if you got a fresh-ish one).
Adding the roof tiles carefully

My wise mum stated the obvious 'have you ever made gingerbread before?' - so I went off and tried all recipes out there until I found the one that not only tasted nice but also stood up to the task of becoming a house covered in icing. The recipe below has been tested over years and I have made many houses and have given classes in making your own gingerbread house and it worked everytime.

It is great to make with children (although you might not get a standing house) as they have fun putting all the sprinkles on (so much that you will still find them around Easter in your kitchen) and it's a great way of getting kids involved in baking and cake decoration. And if you are not confident to start with a house, try your hands on a gingerbread heart instead. 


Gingerbread 


250g unsalted butter

200g dark muscovado sugar

7 tbsp golden syrup

600g plain flour

2 tsp bicarbonate of soda

4 tsp ground ginger
Hardboil sweets (coloured) (optional) 
Sparkles, sugar decorations, mini marshmallows etc. 

Royal Icing


3 egg whites

450g icing sugar

½ teaspoon cream of tartar

½ teaspoon almond extract (optional)


Cake board to fit the house on (use a larger size to create a garden etc)


Heat oven to 200C/fan 180C/gas 6. Melt the butter, sugar and syrup in a pan. Mix the flour, bicarbonate of soda and ground ginger into a large bowl, then stir in the butter mixture to make a stiff dough. If it won’t quite come together, add a tiny splash of water.


Cut out a template (or buy cutters). Put a sheet of baking paper on your work surface and roll about one quarter of the dough to the thickness of about 0.5cm. Cut out one of the sections, and then slide the gingerbread, still on its baking paper, onto a baking sheet. You can cut out doors & windows. To create a 'glass window' crush some of the coloured (make sure they are the clear type sweets) and place it in the cutout of the window. It will melt during the baking process and creates a beautiful glass effect. Repeat with remaining dough, re-rolling the trimmings, until you have two sidewalls, a front and back wall and two roof panels. Any leftover dough can be cut into Christmas trees, if you like.


Bake all the sections for 12 mins or until firm and just a little darker at the edges. Leave to cool for a few mins to firm up, then trim around the templates again to give clean, sharp edges. Leave to cool completely.

I normally leave the gingerbread to dry overnight before I am starting to use it for building the house. 

When ready to start, prepare the royal icing. Beat all ingredients on high speed for 10 minutes. The icing will be thick and glossy. This icing hardens quickly, so leave the bowl covered with a damp cloth while working.


It is easier to decorate the  pieces before assembling the house, making sure that the roof tiles are not overloaded. Let your imagination run wild. 

Start with one wall piece and set it on icing
When the icing has dried on the gingerbread pieces, it is ready to be assembled. Start by spreading some of the icing on the cake board and gently press the first wall piece in it to stand up. Don't press too hard. Now, add the side wall to the first wall, again, pressing into the icing gently. Now, still while holding gently, pipe icing in the gap of the joining pieces. It should now stand on its own. Pressing it won't help, so let it be. If you think it is falling, pop something on the inside to hold it up. 

Continue with the other pieces until you have the foundation ready. Now comes the most frightening part, attaching the roof. Pipe a good measure of icing on the rim of the walls and attach the first roof tile, gently pressing it down. It should hold on its own - please don't press as you will move the tiles (trust me on this one). Wait until the icing sets before adding the last piece. 

In case you have used the hardboiled sweets and your door is wide enough, why not light a tea light and put it inside. The light from within will shine through the 'glass' windows. 

Please send me your photos if you are making your own gingerbread house - love to hear from you 

Creation at a class I gave in late November

Creation at a class I gave in late November


Pieces needed for a house with stained window effect

Have everything ready to go

Using an adapter helps if you like to use different nozzles for piping


Add the second wall

Pipe icing into the cap to join the 2 pieces


Adding finishing touches

Use different sprinkles and decorations


Monday, December 8, 2014

Mincemeat Flapjacks

Hampers are a great gift for foodies - you get all the wonderful goodies (at least if someone took care creating the hamper) that you wouldn't normally buy. And since it is Christmas, a jar of mincemeat surely will be part of the hamper. If you are like me, you will be tired of mince pies by mid December, so here is a lovely alternative to mince pies for using a jar of mincemeat (it is also worth making your own, so much better than the shop bought unless you get an artisan one). Flapjacks last about 2 weeks in an airtight container and are therefore wonderful gifts to either add to (you might have guessed it) a hamper or simply a little token when you are invited for a dinner party. By the way, if you are still looking for an awesome hamper, check out Flemings Restaurant, Longueville House, Nash 19 and Bradley's Off License as well as Urru in Bandon.

I am using here my own mincemeat that I make every year and I think it is awesome (obviously) and I haven't bought a jar (the last one I bought was simply yuk). If your mincemeat seems a bit chunky, mince it down more, maybe adding a tbsp of Cointreau (or orange juice if children will eat it) - very tasty and it will go further.  It took Mr T only 2 days to finish the whole batch of flapjacks - yes, they are that good.

Mincemeat Flapjacks

  • 400g porridge oats (I use normal ones, but try a mix of jumbo and normal oats)
  • 100g almond slivers
  • 150g butter
  • 3 tbsp honey (or golden syrup)
  • 2 tbsp vegetable oil
  • 400g mincemeat

Pre-heat the oven to 180C

Grease and line a 20 x 20cm square tin.

Mix the oats and almonds together in a bowl. Melt the butter, honey (or golden syrup) and oil in a pan over a medium heat. Pour onto the oats mix and stir until well combined.

Press half the mix into the tin,  using the back of a spoon to press it down firmly. Spread the mincemeat over the mix and top with the rest of the oat mix, again pressing down firmly with the back of the spoon. Bake in the oven for about 20 mins until golden brown.

Using a knife, mark squares and leave to cool for about 30 mins before cutting it into the marked squares.

You could also add shredded coconut, sesame seeds and other dried fruit like blueberries to the oat mix.

Enjoy xx


Sunday, December 7, 2014

Mini Banana Cakes

The other day, my friend Sally asked me to bake some cakes for her cake sale at a local church. Of course I obliged. She was quite persuasive as she got loads of cakes, biscuits and cookies to sell for her pop up stall. One creation I liked were mini banana cakes by her Italian friend. They were topped with lovely caramel. We were busy so I couldn't ask her for the recipe of these small delights. 

So today, I saw the sorry look of my bananas in the fruit bowl and thought I give it a try - so here is my version of mini banana cakes, just that I iced them with simple white icing rather than making a caramel (call me lazy if you like). These little cakes are perfect for an afternoon tea (it's so in at the moment - check out The Pastry Fork for private tea parties) or for in between when you fancy something sweet. They are easy to make and last about 3 days (since we are using fresh banana, they won't last very long). The ginger gives the cakes a bit of a lift and warmth, perfect for the time of year. You will need a mini bundt tin/mold for these cakes. If you don't have one, you can use normal muffin tins (you should get 12 out of the mix).

Makes about 16 mini cakes

Mini Banana Cakes
  • 300g plain flour
  • 3 tsp baking powder
  • 1 tsp ground ginger
  • 115g soft light brown sugar
  • 60g butter
  • 2 tbsp honey
  • 125ml milk
  • 2 eggs
  • 2 medium bananas, mashed
  • oil/butter for greasing the cake tins
  • 150g icing sugar
  • warm water

Pre-heat the oven to 180C and brush the tin with melted butter or vegetable oil. 

Sieve the flour with the baking powder, brown sugar and ground ginger into a bowl. In a pan melt the butter and honey. Measure the milk into a jug and mix with the eggs. Combine everything with a wooden spoon, adding the mashed bananas, making sure that all flour is combined but not overworked.

Spoon the mixture in the prepared tin, not overfilling the cavities (just below the rim). Bake for about 20 mins (check with a needle, if it comes out clean it is done, otherwise return to oven for a further few minutes). 

Cool on a wired rack until cool. In the meantime, put the icing sugar into a bowl and add enough warm water to make the icing smooth and pourable (careful here as too much water will result in a skinny icing, so add little by little). Spoon over the cooled cakes and enjoy x
 

Tuesday, January 14, 2014

Grapefruit Slices

This is a great standby recipe when you have some grapefruit (also lemons & oranges) laying around that need using up. It is also a wonderful treat for a Sunday afternoon (in my house they won't lat much longer anyway). The recipe is divided into 2 with the base bakes first and then a second time with the topping. Sounds more complicated than it actually is. You might need to add more sugar if using lemons but grapefruit and oranges should be sweet enough for the amounts given below. As always, please let me know if you tried it and what you thought. 


Grapefruit Slices

  • 225g plain flour
  • 50g icing sugar
  • 175g butter

  • 4 eggs (medium)
  • 400g caster sugar
  • 25g plain flour
  • 1/2 tsp baking powder
  • zest of 1 large grapefruit (more if you like more citrus flavour)
  • 50ml fresh grapefruit juice
  • Icing sugar for dusting


Preheat oven to 160c (fan)/180c/gas4

Sift the flour and icing sugar into a bowl and rub in the butter until it resembles breadcrumbs. This step is very important to ensure a good base for the slices. If you leave large knobs of butter in the mix, you will end up with a crumbly base. Stir in 1tsp water and mix well with a fork or knife. Form a ball. Press the mixture evenly into a 33x23cm baking tin (I used baking paper on the base of the tin). 

Bake for 15-20 mins until lightly browned (you want a pale golden colour). Remove from the oven and leave to cool. 

In the meantime, make the grapefruit mix by beating together eggs, caster sugar, flour, baking powder, juice and rind in a bowl until well combined. Make sure that the zest is evenly distributed through the mix. Pour the mix over the baked base. Return to the oven and bake for about 25 mins until set. 

Place the baking tin on a wired rack and leave to cool. Once cooled, remove from the tin and cut into square and dust with icing sugar. 

Bon Appetit


Tuesday, December 3, 2013

Knockdrinna Cheese - A Day Out

Helen Finnegan
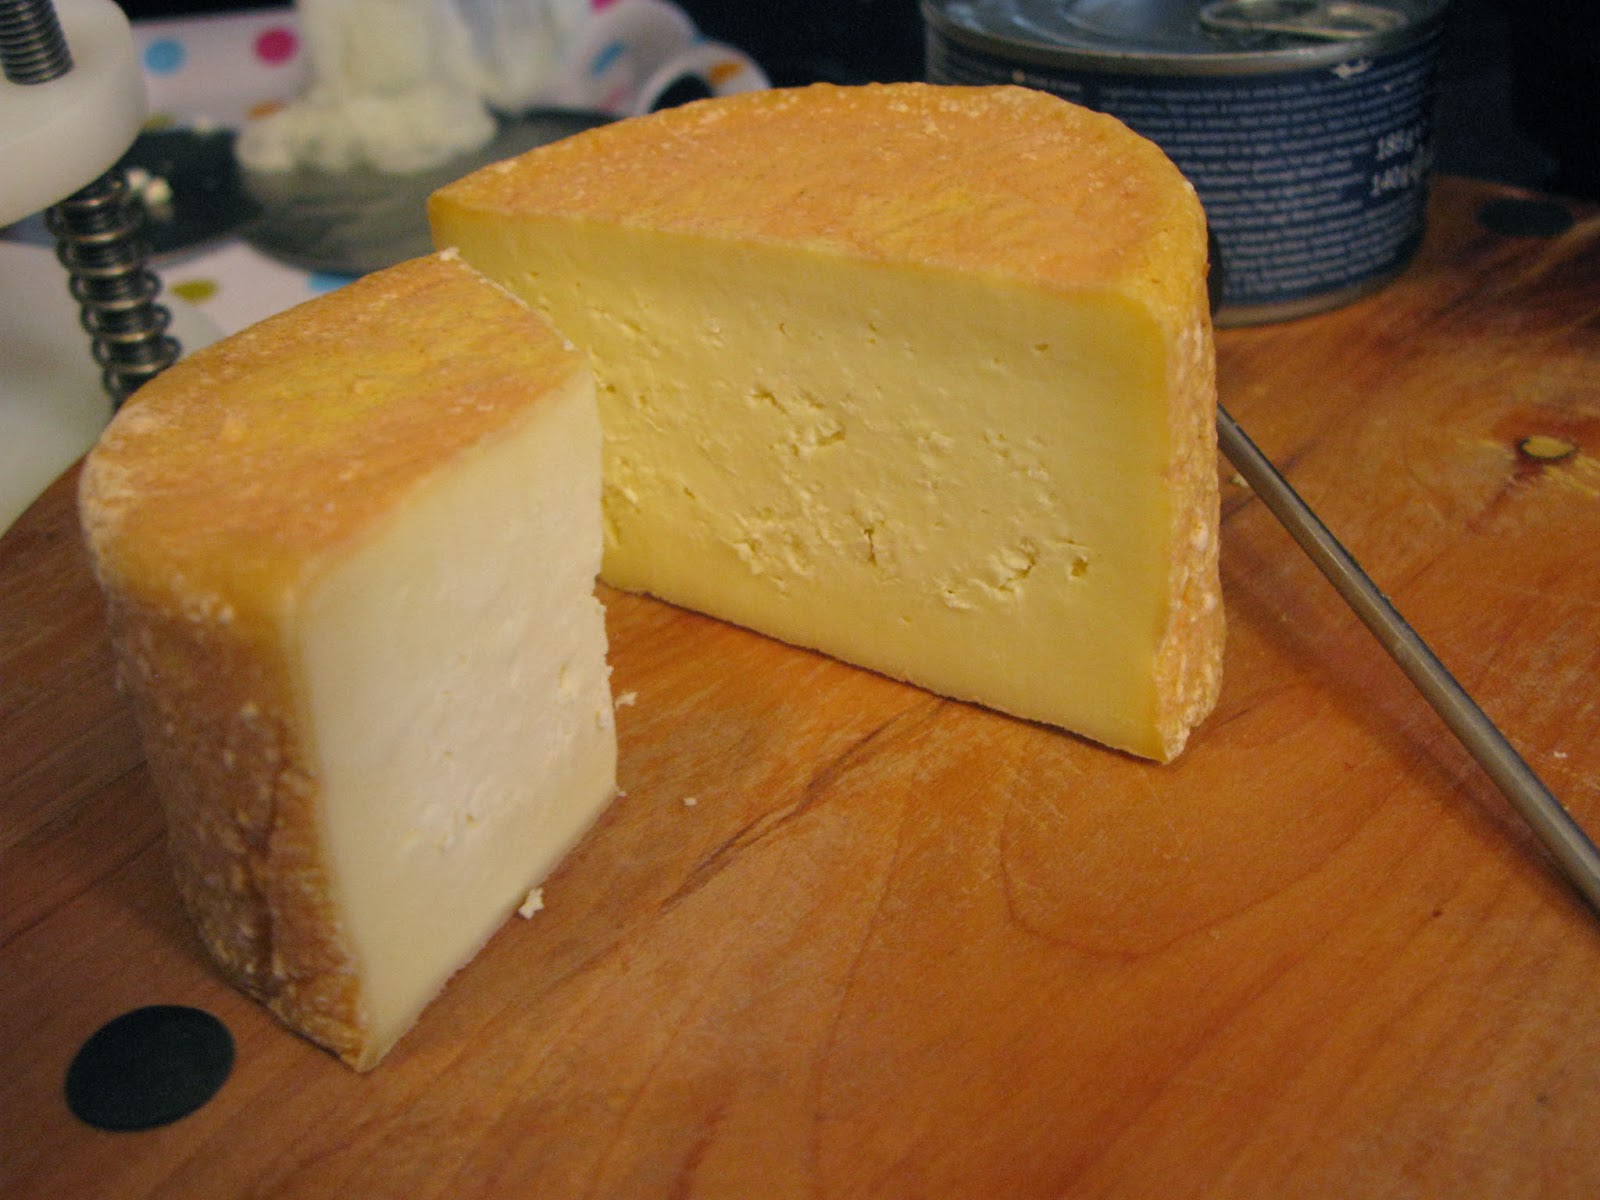
Everyone who knows me more than 5 minutes will know that I love cheese - no, that I am mad about cheese. So much so that I started to make cheese myself at home. I started with Labneh (Lebanese cheese made from yoghurt) and lately with the help of my wonderful farming neighbour, I started to make 'proper' cheese. Cheesemaking is easier than most people think but harder than most people hope. It is chemistry after all.

I was looking for courses on cheesemaking - Teagasc is offering Farmhouse Cheesemaking courses with a certificate at the end (did it 2 years ago and it was great) - but I wanted a more hands-on approach. Luckily I came across Knockdrinna Cheesemakers who have monthly cheesemaking courses at their premises (great opportunity to 'spy' a bit as well in case we are going into production ourselves). Located in Stoneyfort in Kilkenny, Helen Finnegan has come a long way since she started 2004 in her kitchen. She was very lucky as she had great support from the local authority who approved her kitchen for food production and after that, there was no stopping her.

Helen is a great demonstrator and very generous with advice, ideas and tips. We met all in the demonstration room where we introduced ourselves and Helen told us her background and the beginnings of Knockdrinna Cheese. She then went on to heat milk while explaining the use of starter culture and rennet. We saw the milk turning into cheese before our eyes and Helen shared with us the different uses of the curd (making cream cheese from the same batch as the hard cheese) and showed us how easy it is to make butter.

Knockdrinna Cheeses
Lunch was a relaxed affair with tasters of all Knockdrinna Cheeses - most which won awards here and abroad - and homemade brown bread. We all sat around the table as if we known each other for years. It proves again that a good meal makes people simply happy.

After lunch we pressed the curds and checked on 'our' cream cheese which turned out nicely. We then went into the cheese room and we saw the heart of the operation. It is a medium sized business that concentrates more on quality than quantity. Cheese are turned and washed by hand (a new addition of cheese is washed with craft beer) - something that is becoming quite rare with cheesemakers.

We all went home with a bit of cheese, cream cheese and butter and Mr T and I talked all cheese on the way home.

Knockdrinna has an online store but in case you are in Stoneyfort, make sure to pop into their artisan farm shop where you can buy not only Knockdrinna products but also local artisan produce. A great gift idea (apart from the course) are the hampers that have been lovingly assembled with cheese, chutney and crackers.

The cheese course is €80 all included and takes place on a monthly basis. Check out their website for updates.


There is a story to these pink pasta strainers


Thursday, November 21, 2013

Handmade Christmas Stocking

I am really in the groove for Christmas crafting - and these Christmas Stockings are so easy to make and ideal if you have scraps of leftover fabric in your basket, draws or boxes. You could even stitch a name on the top of the stocking to make it even more personal. The size can be varied by enlarging the template. Colours are up to you - I would just recommend that you decide on the order beforehand. The template can also be used for just one colour. Simply cut 2 pieces of fabric according to the template and sew together and finishing it off as below.

You don't need to be a sewing wizzard - as there is no real measuring and you have lines to follow - it couldn't be easier. You can sew it with a machine or by hand - result will be the same.


You will need:

Fabric Scraps
Vlieseline/Rasterquick
Thread
Needle
Bias Binding
Embellishments

Transfer the template onto the vlieseline (available from any fabric shop like Vibes & Scribes, Hickeys etc.) and cut out, leaving a seam of about 0.5cm.

Take 2 fabric scraps and lay them right on right and sew along the line of field 1 (see photo above)

Fold down and press the fold down with your fingernail (we will be ironing the seams later)

You can of course also do it with a machine - I just love the fact that this is so easy to do that I can do it on front of the telly. But of course, the machine will do it a lot faster. 

Continue with the rest of the fabric - always following the numbers and laying the fabric right on right when sewing and folding it down
Continue until all numbered fields have been covered. It will look a bit messy but we are trimming it all nicely into place.
Cut off the overlaying fabric along the lines and iron the seems flat out. It will soften the fabric out as well. You can see now how the stocking will look like.

Add a backing fabric and lay it right on right and sew along the edge, leaving the top open. Taking a bias binding (here I used green) and sew along the top of the stocking. You might like to stitch a name onto it - the best way of doing that would be to use AIDA fabric.
You can add now embellishments - here I added a little bell. You can use beads, sequins etc. your imagination is the limit.